I finally found some free time to get the combing epoxied down and sanded smooth! 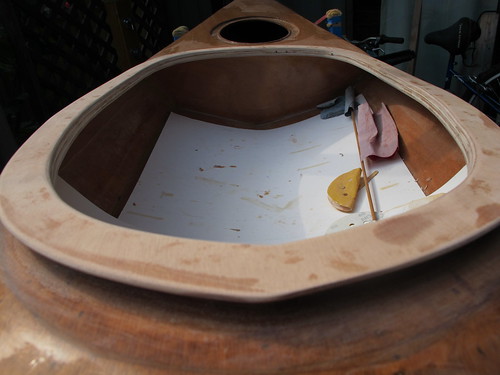
A few more hours of sanding and I should have the boat ready for paint! I know I said that last time, but I had to fit a trip up to Hornby Island, and then back to quick trip to Europe for work somewhere in my spare time. 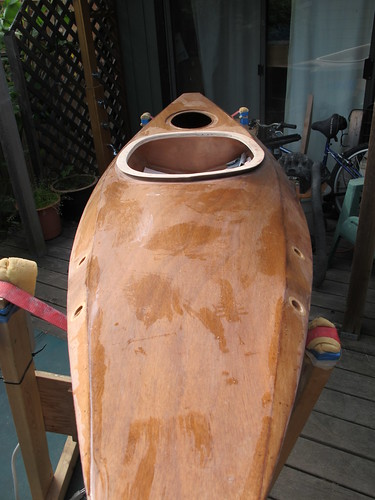
With summer coming I better be getting to the painting soon...
Monday, May 30, 2011
Kayak Build, Part 6
Friday, May 20, 2011
BBQ some Artesian Bread!
With the summer approaching, I am looking to see how I can move my no-kneed artesian bread baking from the oven to the BBQ. I find our gas oven in the trailer is temperamental with temperature (say that five times fast), and since we spend most of the summer BBQing wanted to use my Opposable Mind to solve the solution. Surprisingly with the long tail of the internet, there is little on BBQing bread, so I did some test this week.
In attempting to simulate the oven, I opted to bake the loaf on a cast iron pan (due to the high heat) and a smaller skillet for putting water in for steam generation: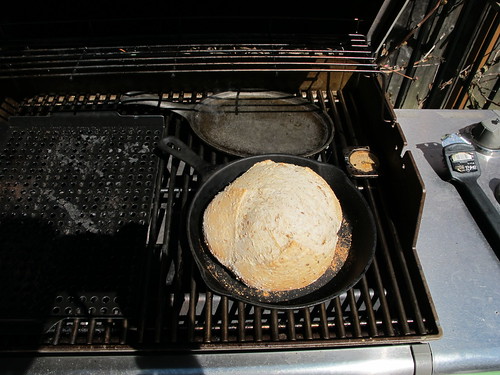
To get the artesian crust, and airy crumb, you need two things: Steam and high heat for a quick initial rise. For no-knead bread the steam is usually created by cooking the bread in a dutch oven, but I was aiming to avoid putting LP-ette's expensive dutch oven on the BBQ so had to improvise.
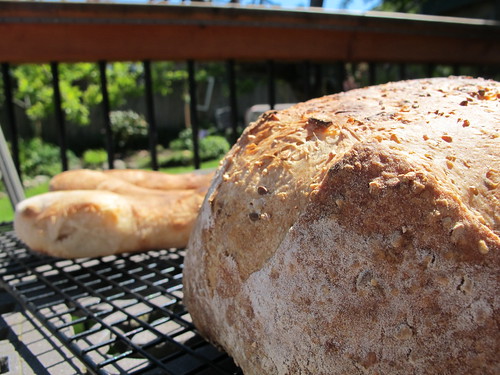
Here was my final result: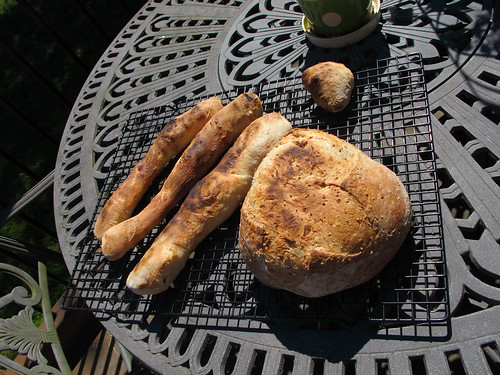
And a nice open crumb: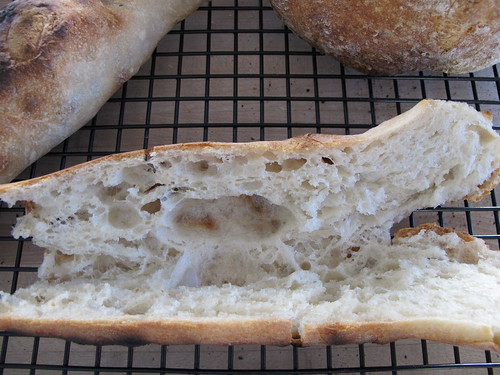
The bottom did scorch a little so I think I need to put either a baking stone under the cast iron pan, or a firebrick to stop the direct heat. On the flip side, I did get the crust I have been working to replicate from the Tartine Bakery in San Fransisco with the constant addition steam inside the BBQ.
Overall, not nearly as good for what I was baking at home, but for my first try on the BBQ it was pretty successful. The kids liked the bread, and the baguettes were gone within a few hours.
I will be in NYC next month, so am planning a culinary trip to Jim Lahey's Sullvian Street Bakery...
Tuesday, May 17, 2011
Kayak Build, Part 5
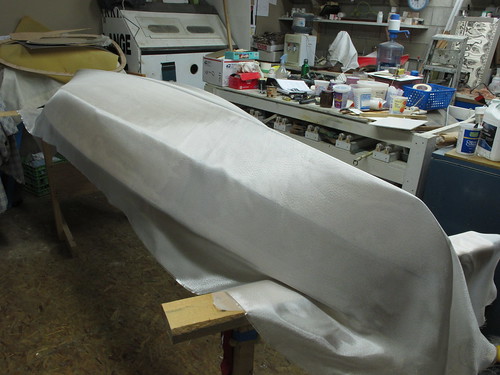 Finally, I arrived at the point of no return - fiberglassing the kayak. I did the hull first, and after the glass set cut along the shear line to have a clean line between the hull and the deck. Three coats of epoxy and I had the hull done, and then I moved onto the deck.
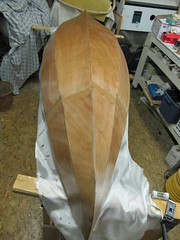
I followed the tips from Lazlo and when I put the fiberglass on the deck, ran a line of tape 2" below the deck/hull line. Before the fiberglass fully set I pulled it back off the tape and cut along the line which gave a good overlap of fiberglass with a clean line. A few more coats of epoxy and I had it smoothed out.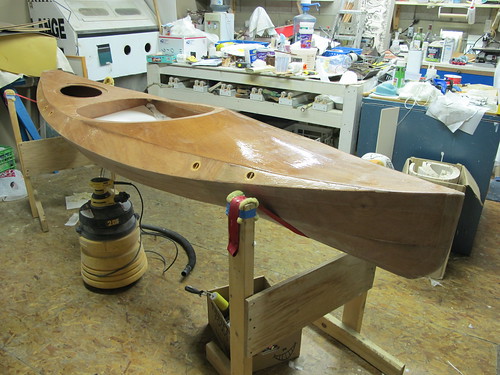
Then I moved from sticky to dusty, and my motto went to: Apply another coat of epoxy, sand 1/2 coat off. Apply a coat of epoxy, sand 1/2 coat off. Apply a coat of epoxy, sand 1/2 coat off. Apply a coat of epoxy, sand 1/2 coat off... More sanding details to come as I spend the long weekend sanding and attaching the combing.
By next week I should have it ready to start painting, assuming I stay in town long enough for work...
Subscribe to:
Posts (Atom)