We were able to get away for the long weekend back to Hornby, a brief rest from the frantic pace of smart phones and home renovations.
The arrival was marked with a change in the weather, a thick black line moving across the horizon which departed the same time as our ferry, bringing 3 foot swells along with it. By late evening the clouds had blown off and revealed a waning gibbous moon, illuminating the field for Riley to fetch his toys in. Unfortunately the cold proved to be too much so we retreated inside to read by the heaters.
Saturday kept the wind and waves from the north but also brought clear sky and a hike around Helliwell. Wet and damp weather revealed 6 different types of mushrooms, a curiosity for Haley who is used to seeing them just in the store. I don't know much about mushrooms, but I looked up a particularly bulbous red and white spotted mushroom - an Amanita Muscaria - and found it is deadly if eaten. Who know such death was innocently living on a well worn walking path? Perhaps this is my year to get a mushroom book and turn into a mycophile.
By Sunday the storm had moved to a South-Easterly, so an excursion to do some storm-watching on big Tribune was on our list to do. Last winter the storms brought in a massive piece of driftwood, and the past few months have added a layer of algae which glowed greed against the white spray of the surf. In the calmer sections of the bay the cold water also brought a crystal clear blue water, giving us a view into the depths we don't normally have in the summer.
This was the last trip I remember where we forgot our camera, which was unfortunate given some of the unique sights we saw: Smurf-like mushrooms, clear ocean views and red-sky sunsets.
I'm not sure when our next break will be. December brings a rest for the holidays, and hopefully time to finish the hatch on the kayak. It also brings 3 more trips: India, England and Toronto, all packed into 11 days. I do have a day off in India this trip as I arrive over a weekend, so we'll see what excursions I can get up to.
Monday, November 14, 2011
The beginnings of a mycophile
Friday, October 28, 2011
Made in Iceland
I totally want to visit Iceland after this....
MADE IN ICELAND from Klara Harden on Vimeo.
Sunday, October 23, 2011
30 Cups of Concord Grapes...
I came home to sour grapes. 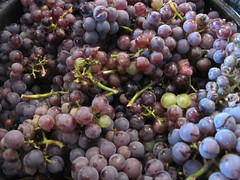
With the wet weather we have been having, the last bit of sun needed to turn the grapes on the vines into sweet concord fruit never did appear. But, as they say, when life gives you lemons, make lemonade. I did not have lemons, but had grapes, so set about making some concord grape jelly on the weekend.
Haley and I took to the vines and picked about five gallons of grapes. If we had have picked them about 3 weeks ago I suspect there would have been about ten gallons, but between the birds and Haley, there were many portions of the vines that were bare.
I have canned before, making jam, but never jelly. Finicky at the best of times, jelly needs the right mix of pectin, sugar and fruit syrup. Pulling out the canning cookbooks gave me a few tips, but it also gave me three recipes that were contradictory in cooking time. One said boil hard for 10 minutes, another boil slowly for 35 and yet another said to only boil for a minute. With 30 cups of grapes I was going to have to make at least three batches, so would have time to try them all.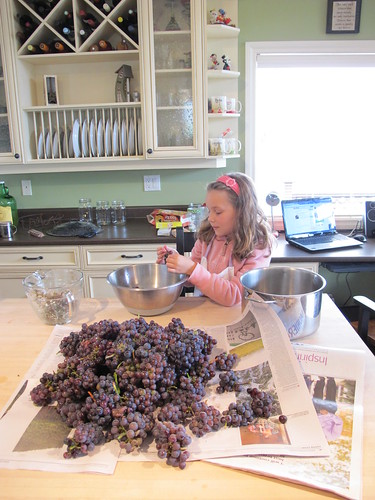
We set about destemming all the grapes. A few of the recipes said to squish out the seeds and separate them for cooking, but that was quickly abandoned given the volume of fruit and the limited patience of a 7 year old.
Next we crushed the grapes, loosening the seeds, and slowly boiling for about 15 minutes. This gave a mash mixture I was able to strain, and the remaining skin and seeds were separated from the juice. I think if I had a smaller batch to make, or had larger grapes (Haley and the birds seemed to have eaten all the larger ones) I would have separated the seeds and the skins, like the Hungry Moose did, as my leftover mix did not have the deep purple concord color I was hoping for.
Three batches gave me room to play with the recipe, and as concord grapes are low in pectin naturally, I added more lemon juice and sugar than I usually do with the strawberry jam we often make. I roughly followed the Epicurious recipe, to get the lemon juice ratio, but using our Clearly Delicious canning book, followed these plans:
2 1/4 cups of grape juice
2 1/3 cups of sugar
juice of 2 lemons (6 tbl spoons)
We gave the mix a medium boil for about 15-20 minutes, but in all three batches, even one I added pectin to and lowered the sugar content, I could not get the jelly to set on a frozen plate. We hoped for the best and simply moved on to canning the jars, finally boiling them for 10 minutes to seal the lids.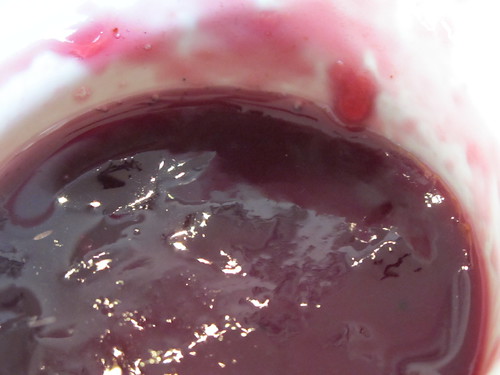
I did leave some jelly on the counter and it had set by the morning, but in one of the batches I was not so lucky. Some was still fairly liquid, so I am going to reboil it and add more pectin and lemon juice. If not, I have a large batch of grape syrup to use for desserts!
Saturday, October 15, 2011
Perdu dans la traduction...
Let's see.... Been home for 6 weeks and managed to fit in 5 trips:
1) New Mexico: Was cooler than expected. No really, it is not as hot as Mexico. I also found out the local golf course puts 30 million gallons of water on the greens a day. 30 million!
2) Seattle: It rained. The original Starbucks in Pike Place market was very busy, but I recommend the french patisserie, Le Panier, which is two doors down.
3) Fresno: Worst. Airport. Ever. Actually, the worst airport is LAX, which I need to go through, so Fresno is tarred with the same brush.4) Hornby Island: For a Thanksgiving weekend I drank Blueberry Beer. All was well.
5) Paris: Love it, but maybe that is because I am here on an expense account. In fact I am in France now, where the fashion is high and my french language skills are low. So far I have tried to order bread (getting a glass of wine in return, which was not rejected of course) and a latte (getting a hot glass of milk instead). I found this video on what a English sounds like to a non-speaker. This is totally what I feel like this week:
Souhaitez moi bonne chance sur le retour à la maison...
Tuesday, September 06, 2011
Been away on vacation....
After 5 weeks of vacation (with only about 2 weeks of work spread in there, around spotty internet connections) I am finally back in the land of high speed internet, actual stoplights, and Starbucks stores on every corner.
Why no posts for a month? Check out this "130 seconds of Hornby" by Grant Baldwin and you'll see why I was too busy to write, at least write on the computer that is.
130 Seconds of Hornby Island B.C from Grant Baldwin Videography on Vimeo.
Pictures of my summer and associated postings coming soon, after I dig out of my laundry pile.
Tuesday, July 26, 2011
Kayak Build, Part 10
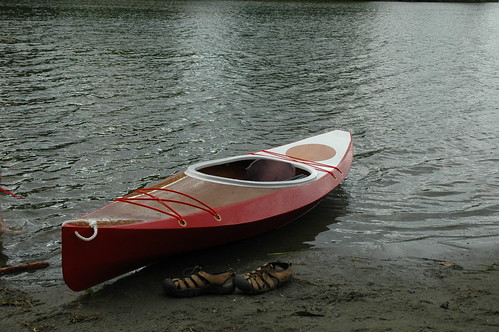
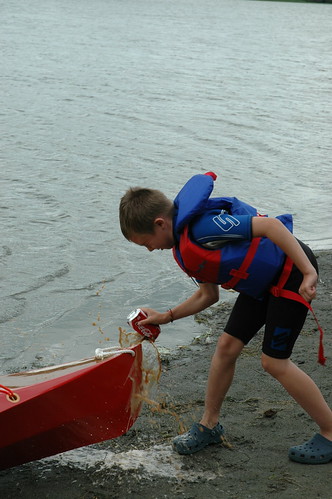
Finally, the kayak has been launched! With summer holiday time approaching later this week we had to try the kayak out in the water for leaks before it was officially launched in the ocean. I had bad visions of hiking down to the ocean with the kayak, only to discover it was not going to float, so opted to try in the lake by our house before we left on holiday.
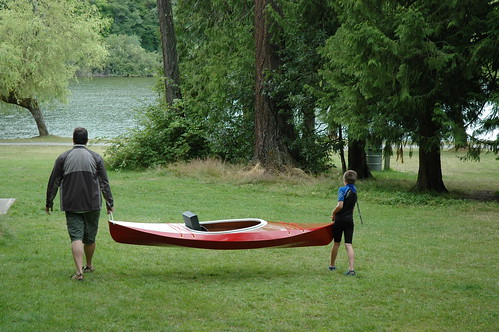
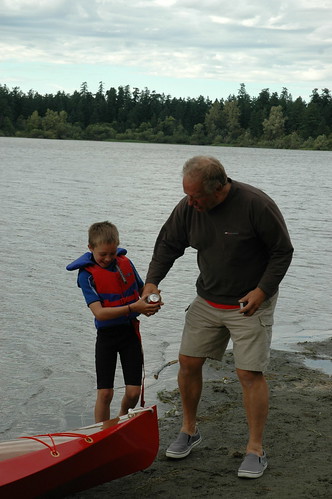
Little J was pretty excited, and even dressed up in his wetsuit for the occasion! We carried the kayak down to the water, and set about getting ready. Skipper Dave attended the launch, and had to explain to Little J about how we need to christen the boat before launching it. Although he wanted to use champagne, we brought the next best thing: a can of Coke! After a few tries, the kayak was christened, but the name is still up for debate: Scurvy Dog, Red Rock or Mario. I am secretly hoping he has some better names in mind...
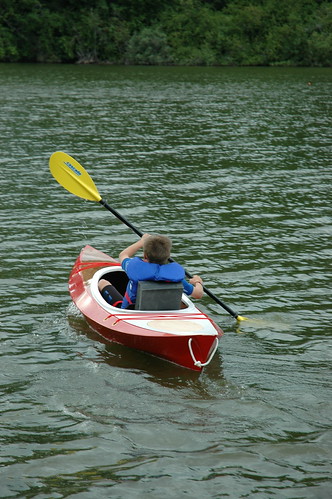
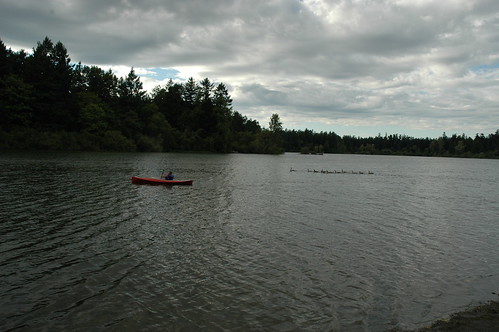
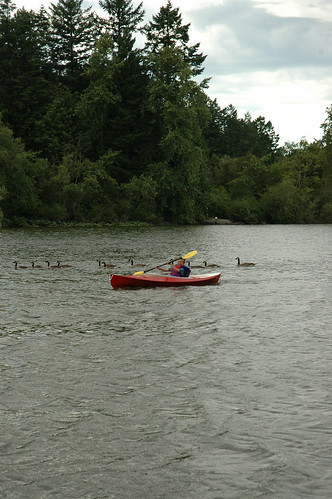
As Little J paddled about, a flock of Canada Geese even came up to check out the new kayak:
There still was quite a bit of water in the back compartment, so the seal on the hatch wasn't 100% watertight. I may need to rig up a knob that turns and compresses the seal more, otherwise everything in the hatch will need to be put in a watertight bag. As well there is still a few things left to do to finally called it "finished!", such as paint the hatch cover, do lettering, and make a seat back cushion.
I estimate the time to build it was around 150 hours. There was much time spent working out the magnets to hold the hatch down, plus to make and epoxy / varnish the wooden tie-downs. Other unexpected things included having to re-sand and paint parts of the boat added a few hours, having an 8 year old helping, and generally not knowing what I was doing all the time and just sitting there looking at the boards wondering "How will this fit together?". If I were to do it again, I think I could easily do it in 100 hours or so, including painting and varnishing. Although, if I were suggest to do it again, I am not sure LP-ette will let me.
Thursday, July 21, 2011
Kayak Build, Part 9
We finally finished the painting, and have almost finished all the small parts! It is true that the last 10% is 90% of the work.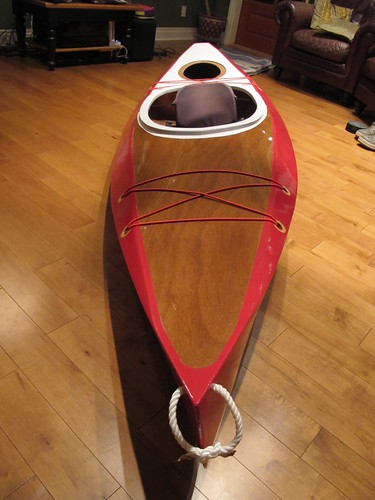
Little J helped do the final painting steps, which took about 3 weeks longer than anticipated. We ran into problems with the easypoxy on the combing for some reason, and had to sand it off. There was a yellow film that appeared and was fairly tacky, so not once, not twice, but three times it needed removed and sanded down to the wood. Even the final coats also would not setup properly in a few small places and is still a little tacky in places. I have a feeling this winter will be sanding and refinishing the combing all over again.
One thing Jordan also helped (and picked) was the red tie-down bungie cords. I am not sure I am totally sold on the color combinations he chose, but it was his kayak, so he got to pick. He is lobbying hard to name it "The Scurvy Dog", so I really hope to change his mind!
The Hatch:
The hatch is still not quite finished yet, but we did get the magnets all epoxied in, which seems to hold it down fairly tight. I talked a little about it in Part 4, but actually didn't know if it would work until I got it all built.
Here you can see we put 10 magnets around the hatch, each inset into the deck and epoxied/fiber glassed over them: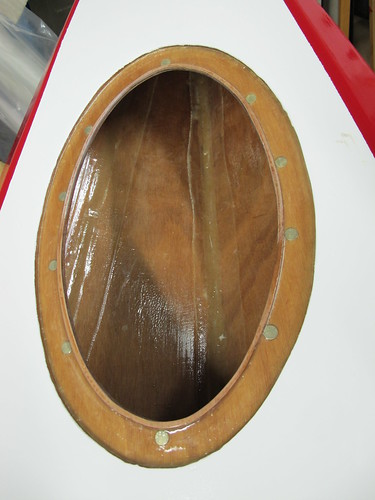
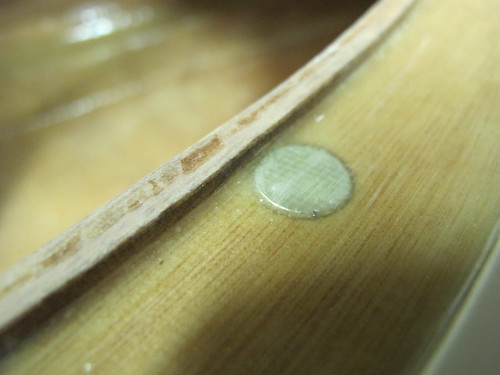
On the hatch, we ran into problems and had to cut some reliefs in the stiffner and then re-stiffen it with a camber to match the deck, finally just epoxying the magnets right on top of the wood. I will have to finish the hatch with an epoxy spread, and then paint it all white to match. Ultimately we will tie the hatch down with a bungie inside, just in case it the magnets let lose and it comes off.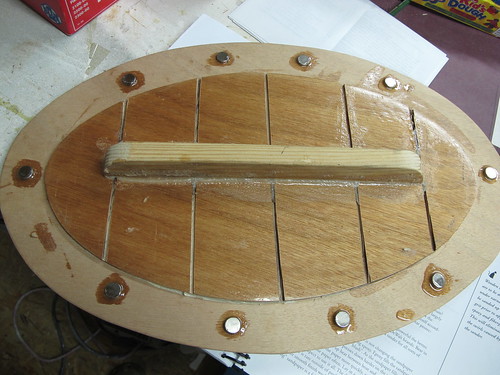
It was actually a pretty tight fit, and I needed to put a knife in to pry the it off and break the magnetic seal. To finish the hatch we will either need to put a pull hole in the hatch, or a knob on the top to help open it.
Still to do:
- Finish the seat for Jordan, as it needs to be adjustable for his small height.
- Splice the ends of the rope together where the carry points are (I just tied them in a knot for now).
- Talk Little J out of naming it "The Scurvy Dog" and into something more, er, normal.
- Still some touch-up paint that needs done where the white bled through the tape.
- Install a water bottle holder. Yes, Little J has insisted on such an addition.
- End-pour, and if needed, some floats inside for buoyancy.
Next post will be Part 10 of the Kayak Build, and hopefully my last (for now). Then I will have to covertly figure out how to build a SUP....
Tuesday, July 05, 2011
Little J joins the Volunteer Fire Department
Little J hanging out in one of the HIFD trucks. Thanks to Doug for giving us a tour! He was secretly looking for how to turn on the lights when he thought nobody was looking....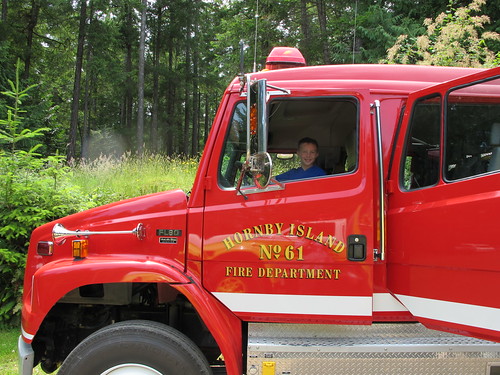
When we got back LP-ette asked me if I would join the rank of volunteer fireman if we moved up here. I think that his her way of placating me for when I wanted to go to back to medical school but was told "not during this marriage you're not", or something similar to that.
Wednesday, June 22, 2011
Kayak Build, Part 8
Painting has started!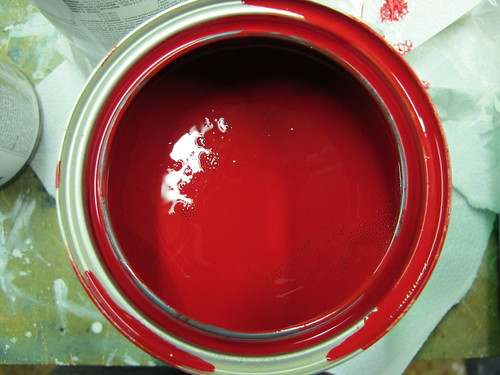
Bottom coat is done and next we start on the top.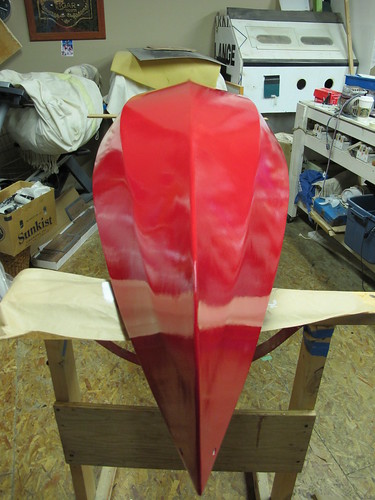
Little J has opted for a red bottom that wraps around onto the deck, and a white deck at the stern, with a varnished bow. Jordan was in charge of tipping the kayak as I did the rolling: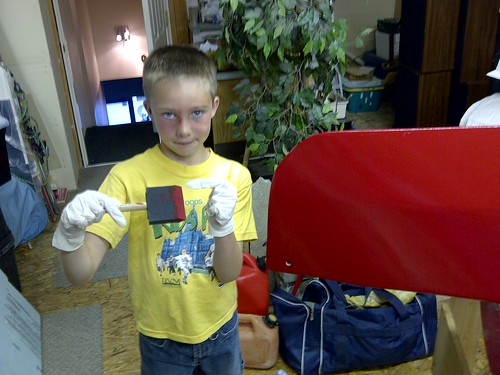
It looks like I did have some bleeding under the tape, so we will see what that looks like tomorrow when we pull it off.
With any luck it will be water-ready fairly soon!
Monday, June 20, 2011
Kayak Build, Part 7
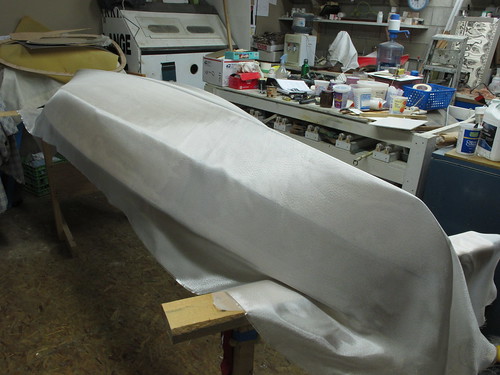
Finally, sanding is all done!!!
Here's the kayak, as it rests in our living room under the guise of "I didn't want to ding it again carrying it down into the basement for a quick epoxy of the seat-mounts". I had to promise to get it out of the house as soon as the epoxy set, and back to the boat-building garage at Skipper Dave's.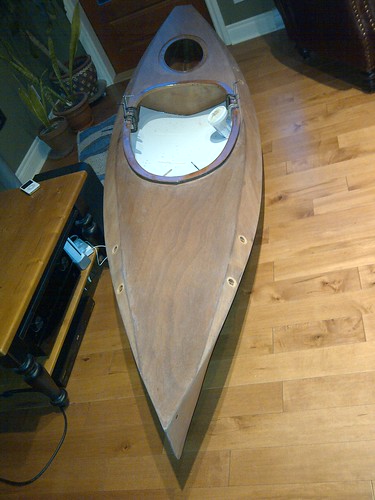
Last week I took Little J down to the marine store to pick the paint colors for the kayak. He had been wavering between orange and blue, but since they didn't have orange in the Pettit Easypoxy Paint I was going to get and I wouldn't let him get blue (so he wouldn't blend into the ocean on us), a large discussion over the benefits and drawbacks of yellow vs. red happened in the paint aisle. Finally he decided on Bright Red, but would not divulge his reasoning.
This weekend we managed to sneak out of the house with J and get two coats of bottom-paint on the hull. I am hoping this will make it a bit more tough against the bumps on the barnacle covered rocks that will evidently happen. He was insistent that I take some pictures of him paining it.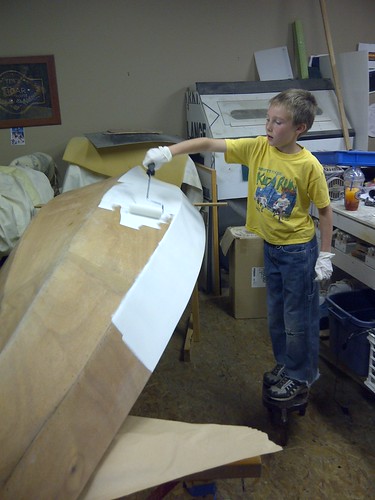
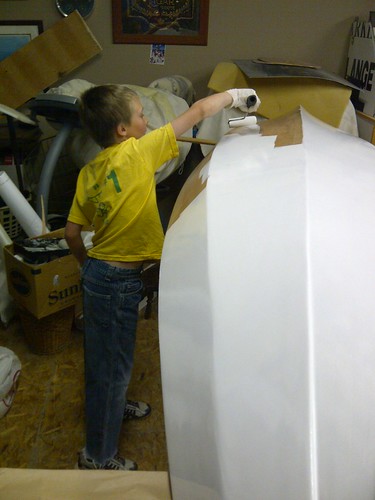
Finally, after a sand and another coat the hull was all ready: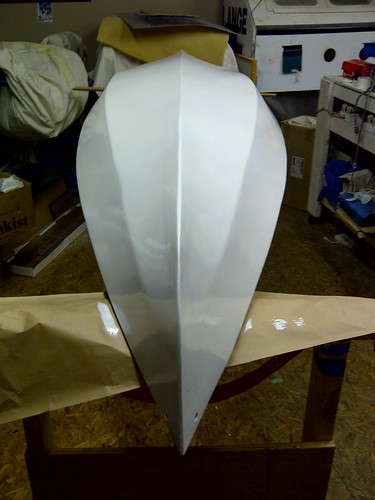
The bow is being varnished, while the rest of the boat is going to be painted red: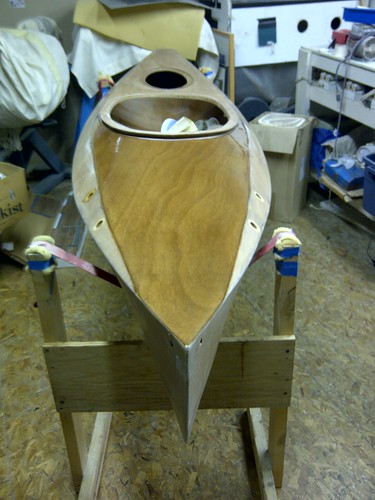
Once the paining is done I need to finish up the seat and the hatch cover, so only a few more hours of work before it is ready for a test run at the beach!
Wednesday, June 15, 2011
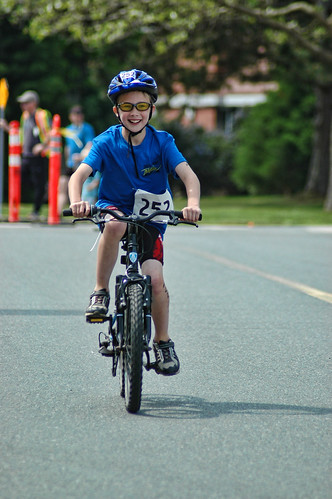
Little J's Triathlon
Little J had his first triathlon this week. The 8 year old's version of short course consisted of a 100m swim, 5km bike and a 1km run.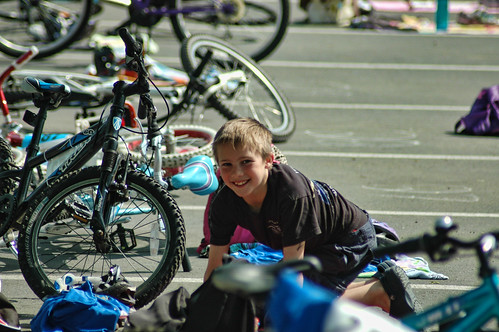 The week before the race his procrastination subsided, and he started to get into the zone. "Dad, when can we practice transition!" was the echo heard throughout the house all week. Coming out of the shower "Dad, can I practice getting changed?". Finishing dinner, "Dad, can I go practice a quick transition!?", and then he would lay out his transition gear, and do a quick practice in the living room. After several virtual trials the one thing he decided was what not to do. "No socks! That saved me almost a minute!" While we applauded his effort to practice transitions the one - or rather three - things he did not practice was any actual swimming, biking or running. This meant while his race was bound to be slow, his transitions would likely be blazing fast!
Race day arrived, and he was up and ready to go the fastest we had ever seen him get out of bed and get changed. I was making my breakfast in the kitchen to fuel up for my long day of waiting when he plopped down. "I'm having some cereal for breakfast. Some Vector! Because that is what bikers eat!" The rest of the morning consisted of reminding him to get things ready, as he was so excited he kept forgetting things like "put water in your water bottle!".
The race times were set to have the different age groups go in waves, over a 3 hour period. Little J was excited about this as he was able to get there early and watch some of the older racers do the swim and transition. While we watched the other kids we went through his race plan, where to exit the swim and which way to run to the transition, and the route to get in and out of the transition area. All throughout it he kept asking things that implied he was going to be so lightening fast, people would be in awe. "So dad, what happens when I am riding in first, and I don't know where to go?". All I kept thinking was "I wonder if he'll dropout when he gets passed in the pool in the first lap and realizes he won't be near first place?"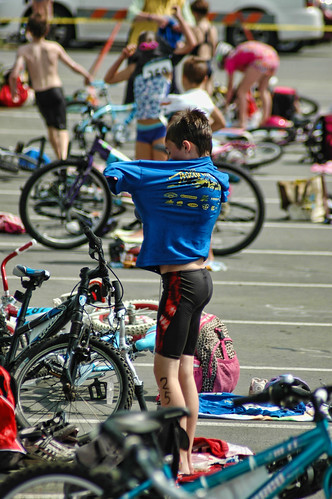
Finally the time to race arrived and I offered him one more piece of advice. "J, before you go to the race do you have to go to the bathroom?" His reply was as anticipated: "Nooooo!" Knowing what was about to happen next, I tried to steer him towards the inevitable and tried to coax him with a "Ok, so go try anyway.". Not surprisingly I was rebuffed and he took off towards the pool deck for the briefing.
The next scene was classic Little J: Imagine a cluster of 20 kids, all getting ready to race and one line disinter realizes he has to depart the crowd and head for the bathroom. "Is that my child?" I think, only to confirm a second later that sure enough, it was. While all 19 kids went one way to line up for their swim, one headed in the opposite direction to the bathroom. It was at that moment I made a mental note to share with him the age old tradition of peeing while racing.
We had rehearsed his race plan a few times, and all of them ending with "Do a swim warmup, but only about 10-20 meters!". I was foolish enough to think he would heed my advice, and we all watched from the stands as he did a 100m warmup, about 2 minutes before the race was set to start.
Right before the race start, I took a mental note of what Little J's mental status was:
This was going to be an epic something of a race, with the something to be determined in the next 30 minutes.
The gun went off, and like a shot he pushed off and proceeded to swim the fastest front crawl I had ever seen him do. Unfortunately for Little J his burst of speed only lasted for about 20 meters, then he dropped off and was passed by another racer. He must have decided to mix it up because at that point he floated over and switched to a leisurely backstroke pace for the remaining 80 meters. He finished the swim, and made a quick exit to his transition area, which he had strategically positioned by a tree so he could find it when he came out.
All the practicing of drying off and sitting down to get his shoes on seemed to go out the window, because once he hit transition he just wiggled on his shirt over his wet body, and then stood there while trying to stuff his wet, sockless feet into his shoes. Most of the kids seemed focused on transition, a few even ignoring the overbearing parents yelling instructions, but Jordan had a huge grin on his face as he exited on to the run. Two laps of ring-road gave the same picture: Most kids gunning it with a nice even cadence, tongues hanging out like MJ going for a dunk, and glassy eyes focused on the road ahead. Little J on the other hand was merrily biking along like he was out for a ride to the market.
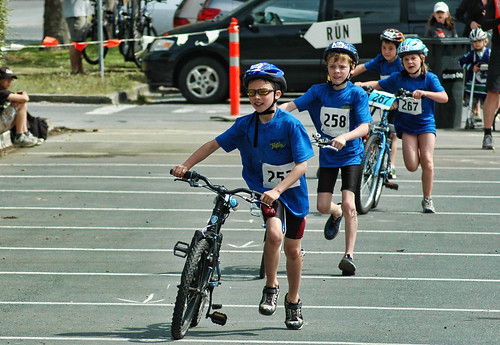
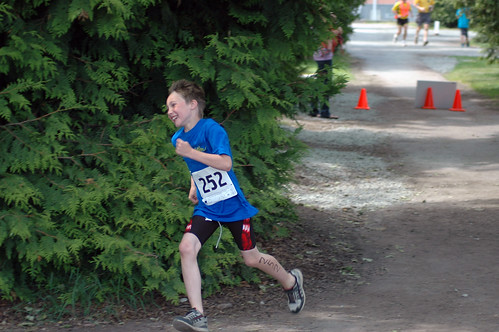
He rode by us heading into the bike to run transition, and was out in under a minute, helmet gone but the same little grin attached to his running face. In fact, he was happily jogging along, only to add in a burst of speed when he was about to be passed by another racer. Like the swim, his burst didn't last long and he soon dropped back to his happy pace. We were all there for his finish, which his final time was 27:24. He came in 22nd, and later announced "I like the number 22, so I'm happy with that".
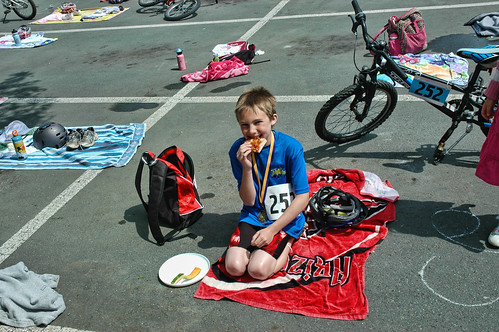
Like any true triathlete, his next stop was the food table where he devoured about four rice crispy squares and two slices of pizza.
He did have some post-race memorable quotes:
While riding home in the car:
And with that his first triathlon was done, and he's already asking when the next race is.
Monday, May 30, 2011
Kayak Build, Part 6
I finally found some free time to get the combing epoxied down and sanded smooth! 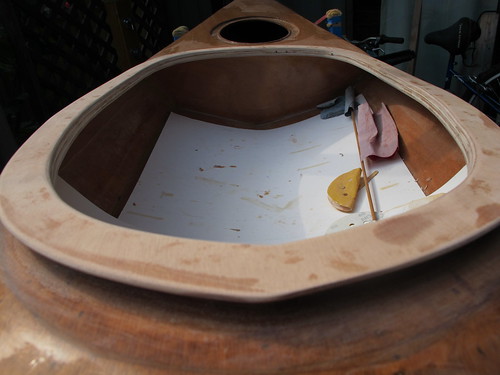
A few more hours of sanding and I should have the boat ready for paint! I know I said that last time, but I had to fit a trip up to Hornby Island, and then back to quick trip to Europe for work somewhere in my spare time. 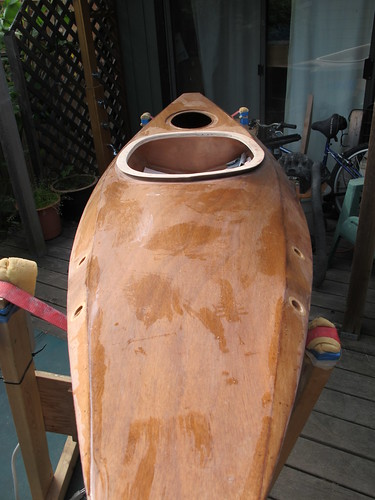
With summer coming I better be getting to the painting soon...
Friday, May 20, 2011
BBQ some Artesian Bread!
With the summer approaching, I am looking to see how I can move my no-kneed artesian bread baking from the oven to the BBQ. I find our gas oven in the trailer is temperamental with temperature (say that five times fast), and since we spend most of the summer BBQing wanted to use my Opposable Mind to solve the solution. Surprisingly with the long tail of the internet, there is little on BBQing bread, so I did some test this week.
In attempting to simulate the oven, I opted to bake the loaf on a cast iron pan (due to the high heat) and a smaller skillet for putting water in for steam generation: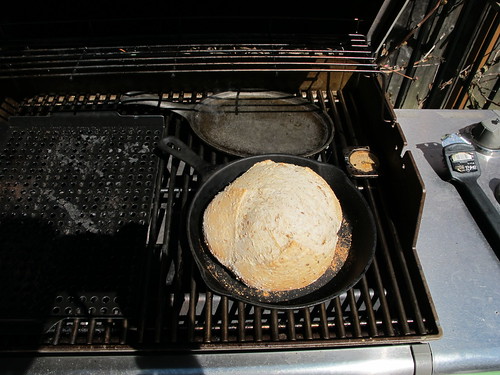
To get the artesian crust, and airy crumb, you need two things: Steam and high heat for a quick initial rise. For no-knead bread the steam is usually created by cooking the bread in a dutch oven, but I was aiming to avoid putting LP-ette's expensive dutch oven on the BBQ so had to improvise.
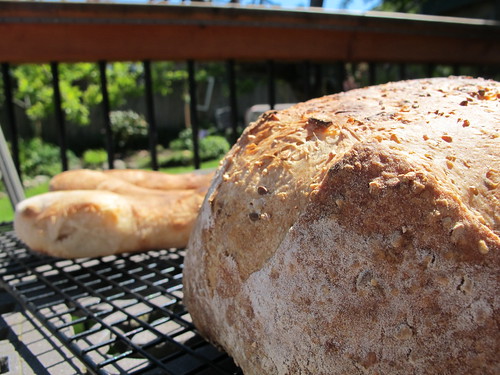
Here was my final result: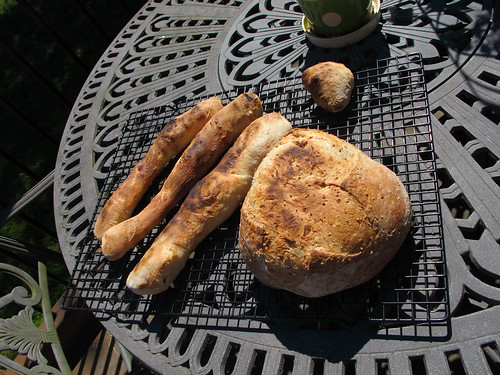
And a nice open crumb: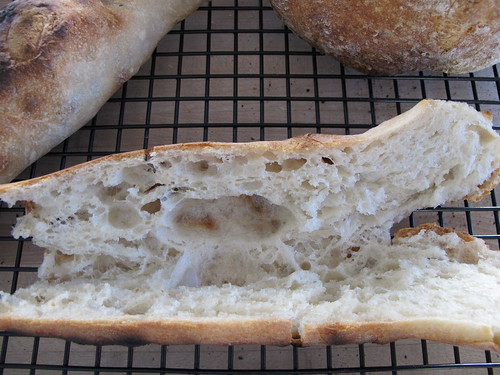
The bottom did scorch a little so I think I need to put either a baking stone under the cast iron pan, or a firebrick to stop the direct heat. On the flip side, I did get the crust I have been working to replicate from the Tartine Bakery in San Fransisco with the constant addition steam inside the BBQ.
Overall, not nearly as good for what I was baking at home, but for my first try on the BBQ it was pretty successful. The kids liked the bread, and the baguettes were gone within a few hours.
I will be in NYC next month, so am planning a culinary trip to Jim Lahey's Sullvian Street Bakery...
Tuesday, May 17, 2011
Kayak Build, Part 5
 Finally, I arrived at the point of no return - fiberglassing the kayak. I did the hull first, and after the glass set cut along the shear line to have a clean line between the hull and the deck. Three coats of epoxy and I had the hull done, and then I moved onto the deck.
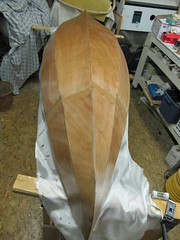
I followed the tips from Lazlo and when I put the fiberglass on the deck, ran a line of tape 2" below the deck/hull line. Before the fiberglass fully set I pulled it back off the tape and cut along the line which gave a good overlap of fiberglass with a clean line. A few more coats of epoxy and I had it smoothed out.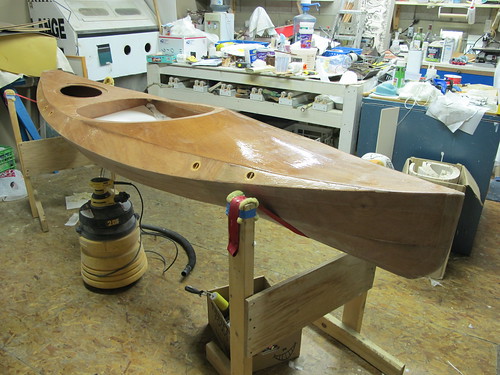
Then I moved from sticky to dusty, and my motto went to: Apply another coat of epoxy, sand 1/2 coat off. Apply a coat of epoxy, sand 1/2 coat off. Apply a coat of epoxy, sand 1/2 coat off. Apply a coat of epoxy, sand 1/2 coat off... More sanding details to come as I spend the long weekend sanding and attaching the combing.
By next week I should have it ready to start painting, assuming I stay in town long enough for work...
Sunday, March 13, 2011
Kayak Build, Part 4
With the hull and deck setting, we turned our attention to some of the smaller parts in the kayak: The combing and the recessed deck fittings.
Recessed deck fittings:
I'm not too keen on building this whole kayak, and then drilling some holes in the edges to mount strap fittings onto so I wanted to do some recessed deck fittings. I looked around on the web and found some good examples (Orca Boats, Kayak Forum discussion board, Andy Waddington's page, Clear Stream Woodworking and Guillemot Kayak), but after test trying to build 2 or 3 of them in my shop I opted for the easier version from Orca Boats.
You can see the rough blank on the left of the picture, and the rest of them tapered, sanded and epoxied and ready to drop into the deck before I epoxy it to the hull for good. The 1/4" dowel will be where the strapping can be tied onto.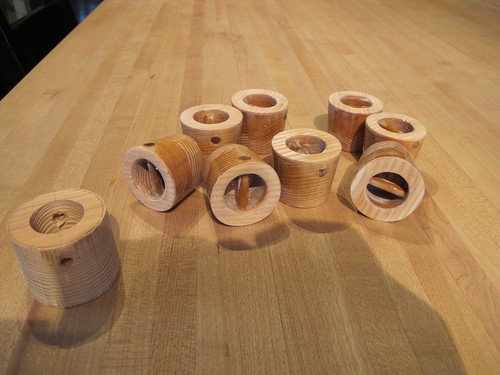
The blanks were cut with a 3/4" ID hole and a 1.5" OD, plus a taper at about 10 degrees. For the mating hole on the kayak deck I drilled the hole 1 3/8" and sanded each hole to fit each blank. I think if I were to do it again I would get a 1.5" OD hole drill and start the first 1/2" for each blank way to ensure I had a perfectly round blank, and then drill a hole to match. I had sanded to a 1.5" diameter line drawn on the blank but wasn't that accurate with the sander so some of the blanks weren't that round, hence the 'sanding each blank and corresponding hole to fit'.
The blanks were epoxied in, with an added fillet of on the back with some wood flour and then sanded flat on the top side to smooth it out with the rest of the deck. There is 8 in all, and they look pretty slick.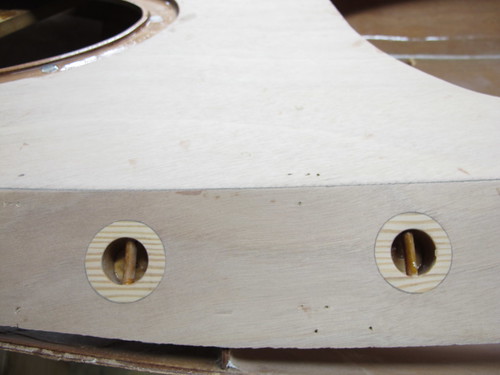
Combing:
Part of the problem with cutting my own parts out was that I didn't make perfect cuts. This became glaringly obvious when I tried to line up 4 stacked parts that made the combing, yet none of the 4 had the same profile all the way around.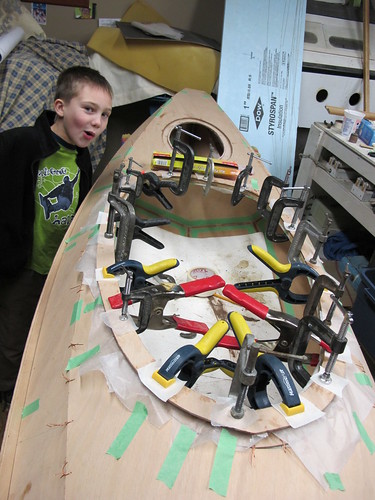
Nonetheless we epoxied them together the best we could and I am just waiting for a large cutting, scraping, sanding, filling, sanding, filling and sanding job to be coming out of this.
I am putting magnets on the hatch for hold-downs so it has turned into a monster project so I am sure it will get it's own blog post later in the build.
Here's my pro-tips for lessons learned (I seem to be creating alot of these!):
Tuesday, March 01, 2011
Vacation time in YYJ
This past February I took a week to have a vacation in my own town: Victoria
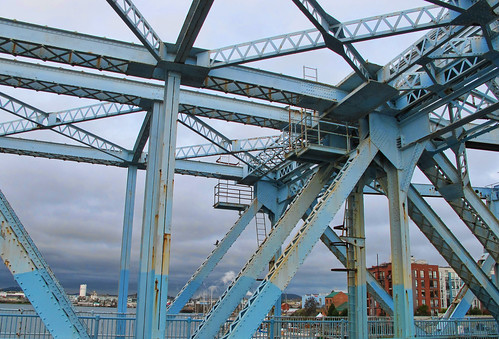
Although it was mixed around the rest of my life schedule, I had my camera with me so had time to take a few random pictures while I roamed. Here's a shot from the top of a downtown building overlooking the Johnson Street Bridge.
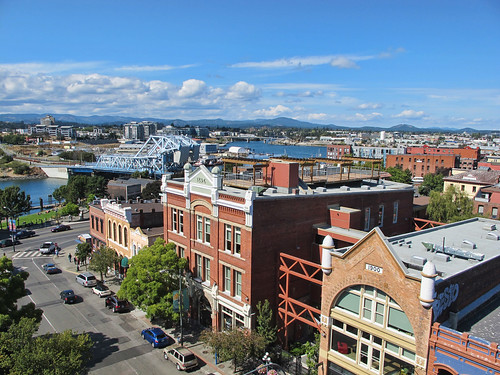
The iconic blue bridge is soon to be replaced with something that will not be so blue, yet regardless of when it goes it will always live on as I hoist a pint of Spinnakers Blue Bridge Double Pale Ale.
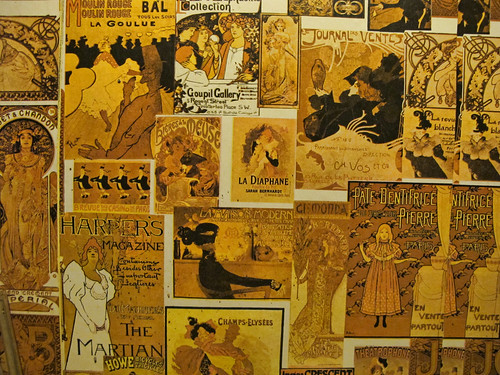
I took a random walk through Chinatown, British Columbia's oldest Chinatown and second only to San Fransisco in North America.

There are a few old alley ways with secondary entrances to shops which provide a circuitous route for the shopper, with many of them catering to cheap reproduction antiques.
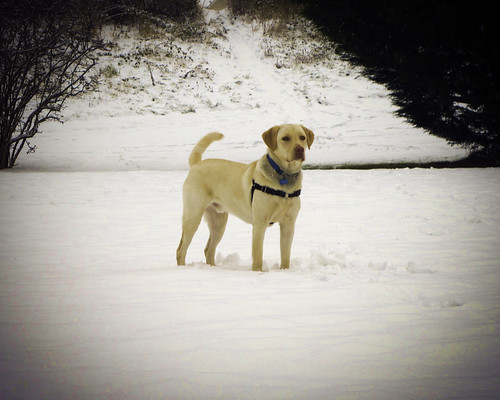
And of course no vacation in your own town is complete without an obligatory picture of our dog playing in the snow:
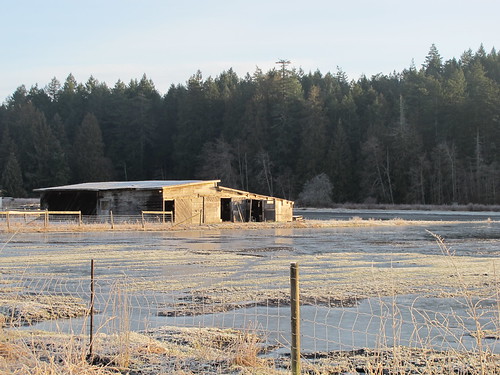
...and a frozen pond as I drove to work one day:
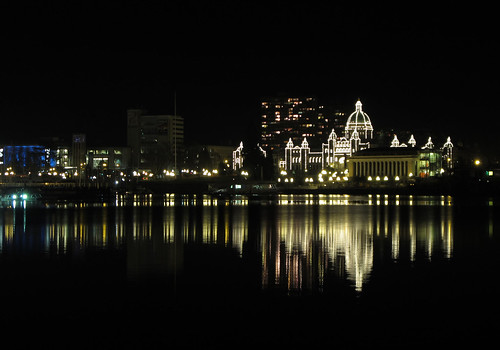
I also had a chance to go downtown in the evening, and took a few shots of the Parliament Buildings at night:
That is all, kayak building and world traveling will resume shortly....
Monday, February 28, 2011
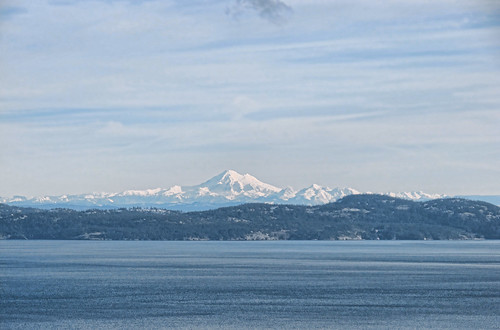
View of Mt. Baker
View of Mt. Baker and the Olympic Mountain range after a hike to the top of Mt. Doug: